To get this cool feature, we just need to add some scripts to the template's HTML and use the right tags for the images. For adding YouTube videos, just a copy-paste of their URLs will be enough.
How to add videos/images in Blogger comments
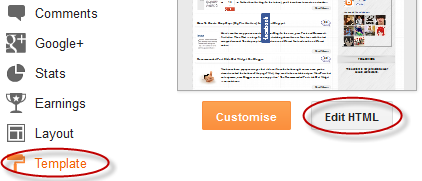
Step 1. Go to Dashboard > 'Template' > 'Edit HTML'
Step 2. Click anywhere inside the code area and find - using CTRL + F - the following tag:
</body>Step 3. Just above/before the </body> tag, paste this code:
<script src='https://code.jquery.com/jquery-latest.js' type='text/javascript'/>Step 4. Save the changes by clicking the 'Save Template' button.
<script src='https://googledrive.com/host/0B4n9GL3eVuV-cEhJOFFLTWdSYXM' type='text/javascript'/>
<script src='https://googledrive.com/host/0B4n9GL3eVuV-QjAwRmpVbEVHZm8' type='text/javascript'/>
How to add YouTube Videos in Blogger Comments
To add YouTube video in a Blogger comment, just copy the URL from your browser's address bar and paste it in the comment box. After posting the reply, you should be able to see the iframe of the video.It's that easy and doesn't require any tags.
How to add Images or Pictures in Blogger Comments
If you need to add any image or picture in your Blogger comment, we will need to use the tags below BEFORE and AFTER the address of your image:[img]your-image-url[/img]Note: replace your-image-url text with the URL of the image you want to share. For more help on how to find the URL of an image, please read this tutorial: How to Get the URL of Images.
Let your visitors know how to insert Videos/Images above Blogger Comment Box
Many visitors coming to your site may not know that they can post videos or images in Blogger comments, so it's recommended to add a short message telling them how to do that. Just access your Blogger Dashboard, go to 'Settings' > 'Posts, Comments and Sharing' and look for the 'Comment Form Message' section - here you need to click on "Add" link and add your text. For example:Do you have any pic to share? Use this code <b>[img]image-url-here[/img]</b>After you have added your text, click the 'Save Settings' button at the top right corner... and we're done.
If you found this tutorial useful and you'd like to see more, please share and subscribe. For any questions, leave a comment below!


No comments:
Post a Comment