How to create calendar style dates in Blogger
Step 1. Go to "Settings" > "Language and Formatting" - "Date Header Format" and change the date format as you can see in this example below (first add day, month and finally year)
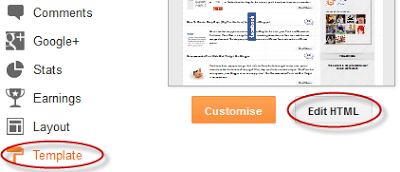
Step 2. Go to Template > click the "Edit HTML" button
Step 3. Click anywhere inside the code area and press CTRL + F to open the blogger' search box
Step 4. Type or paste the following line inside the search box and hit Enter to find it:
<h2 class='date-header'><span><data:post.dateHeader/></span></h2>Step 5. In case you find it twice, replace it twice with this code:
<div id='Date'>Step 6. Now type this tag inside the search box and hit Enter to find it:
<script>changeDate('<data:post.dateHeader/>');</script>
</div>
<b:else/>
<div id='Date'>
<script>changeDate('');</script>
</div>
</head>Step 7. Just above the </head> tag, paste this code:
<script type='text/javascript'>Before saving the Template, here we can make some changes:
//<![CDATA[
var DateCalendar;
function changeDate(d){
if (d == "") {
d = DateCalendar;
}
var da = d.split(' ');
day = "<strong class='date_day'>"+da[0]+"</strong>";
month = "<strong class='date_month'>"+da[1].slice(0,3)+"</strong>";
year = "<strong class='date_year'>"+da[2]+"</strong>";
document.write(month+day+year);
DateCalendar = d;
}
//]]>
</script>
<b:if cond='data:blog.pageType != "static_page"'>
<style type='text/css'>
/* Calendar style date
----------------------------------------------- */
#Date {
background: transparent url(https://blogger.googleusercontent.com/img/b/R29vZ2xl/AVvXsEjJB_YXC7X2cH-sDG82Uux7jOApD9iH45uvjEe-cWp4TbzoBABX9Ea2mRVZJu00MSWmok3_KpDFCDyPAQ0IkWmchk-V7Az2tEsmFH68WLMty5nT63YdGJVqRqwIwb_7zZQ_EkDhZgfSAY8D/s1600/calendar07.png) no-repeat;
display: block;
width:60px;
height:60px;
float: left;
margin: 15px 2px -40px -108px;
padding: 0 0 8px 0px;
border: 0;
text-transform: uppercase;
}
.date_month {
display: block;
font-size: 15px;
font-weight:bold;
margin-top:-1px;
text-align:center;
color:#ffffff; /* Month's color */
}
.date_day {
display: block;
font-size: 28px;
font-weight:bold;
margin-top:-8px;
text-align:center;
color:#282828; /* Day's color */
}
.date_year {
display: block;
font-size: 10px;
margin-top:-8px;
text-align:center;
color:#282828; /* Year's color */
}
</style>
</b:if>
- To change the calendar style, replace the url in blue with yours;
- If the calendar doesn't appear as it should, change -108 with 0;
- With green are marked the areas where you can change the color of the dates
Step 8. Now Preview your Template and if everything looks ok, hit the Save Template button.
That was all... Enjoy!


No comments:
Post a Comment